Wind & hail inspection
A full walk of ridges, valleys and penetrations for lifted shingles, creased tabs, granule loss and seal-strip failure. Every finding is photographed and mapped.
Wind & hail roof inspection
A clear, step-by-step inspection timeline for wind and hail damage — from the first walkaround to a plain-language damage report. See what gets checked, what the marks on your shingles mean, and how a repair decision is made.
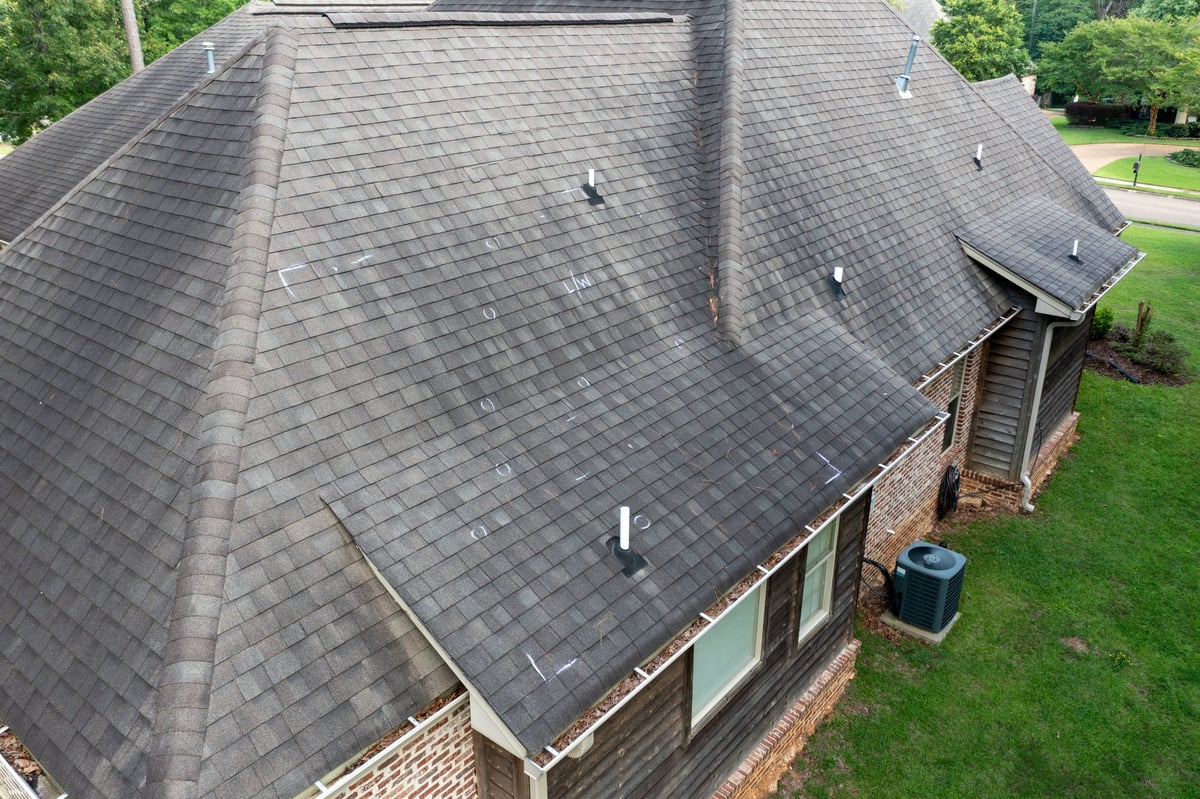
Illustrative image
Chalk circles mark impact points on a hail-tested shingle field.
What we inspect
Wind tears and lifts; hail bruises and knocks off granules. Each service below targets a distinct failure mode so the report tells you exactly what happened to the roof.
A full walk of ridges, valleys and penetrations for lifted shingles, creased tabs, granule loss and seal-strip failure. Every finding is photographed and mapped.
Natural slate and clay tile fail differently — cracked, slipped or frost-shattered units. We document each affected course without walking fragile fields.
Chimneys, skylights, vents and sidewalls are the first places storm water gets in. We test seams and look for stretched or separated metal.
A plain-language tour of what your marks mean, with reference photos so you can compare your own roof to a documented example.
A structured decision sheet: age, extent, and pattern of damage, laid out so the trade-offs are visible rather than implied.
A prefilled sample intake form showing exactly which details an estimate would need — no submission, no storage, nothing sent.
Services shown are illustrative template content, not a real offering.
Storm inspection timeline
A typical template walkthrough runs in five stages. Each stage ends with a documented output, so nothing is left to memory or a verbal summary.

Illustrative image — sample inspection pose, not a real job
Stage 1 · 15 min
Before climbing anything, the perimeter is walked for fallen granules, dented gutters and downspouts, and displaced ridge caps.
Stage 2 · 30 min
Every slope is photographed in a fixed order. A slate deck and an asphalt shingle field get different checklists.
Stage 3 · 45 min
Soft-metal tests on vents and valleys, tab-creasing and seal-strip checks. Impact points are chalked and counted per square.
Stage 4 · 20 min
Attic-side and penetration checks look for staining, daylight gaps and separated step flashing around chimneys and skylights.
Stage 5 · 10 min
A read-only report preview maps findings onto a roof diagram with a repair-versus-replace note for each area.
Damage guide
A reference guide to the five things an inspector looks for first. Compare the visual signature, then see how each one is documented.
 Hail
 Wind
 Metal
 Water
This guide is general education, not a substitute for an on-roof inspection.
See the full services pageIllustrative samples
Fictional inspection scenarios written to show how findings are presented. These are not real jobs, addresses, or outcomes.
 Sample
Two-story · Asphalt shingle · 5 slopes
Finding: Granule loss concentrated on the south-facing plane.
Recommendation path: Targeted section review
 Sample
Mixed roof · Shingle + metal · 7 planes
Finding: Separated tabs along the west valley after a gust event.
Recommendation path: Full-plan inspection
 Sample
Single story · Clay tile · 4 planes
Finding: Stained step flashing and one displaced tile course.
Recommendation path: Repair-vs-replace review
Estimate preview
A real estimate starts with a short, structured intake. Here is an example of exactly which details it asks for — filled in with sample values so you can read it without entering anything.
Storm inspection intake
Example values · read-only
Common questions
General answers for the template. Nothing here is a quote, a guarantee, or a promise of service.
In this template's timeline, the recommendation is within a few weeks of the event — while impact marks, spent granules in gutters and lifted tabs are still identifiable. Delayed inspections can blur the distinction between storm damage and ordinary wear.
Usually, yes. Hail leaves clustered, random impact points with soft, bruised shingle mats and displaced granules. Aging shows even weathering, blistering and cupping across the whole field. The damage guide above walks through the difference.
No. A ground-level walkaround catches a surprising amount: granules in gutters, dented metal, displaced ridge caps. Everything above that level is described in the inspection timeline so you know what an inspector checks.
The template report includes a roof diagram with findings mapped by slope, reference photos for each finding, and a repair-versus-replace note per area. The report preview shown here is illustrative and read-only.
Explore the storm inspection process and the read-only intake preview — the two pages that make up the core of this template.